
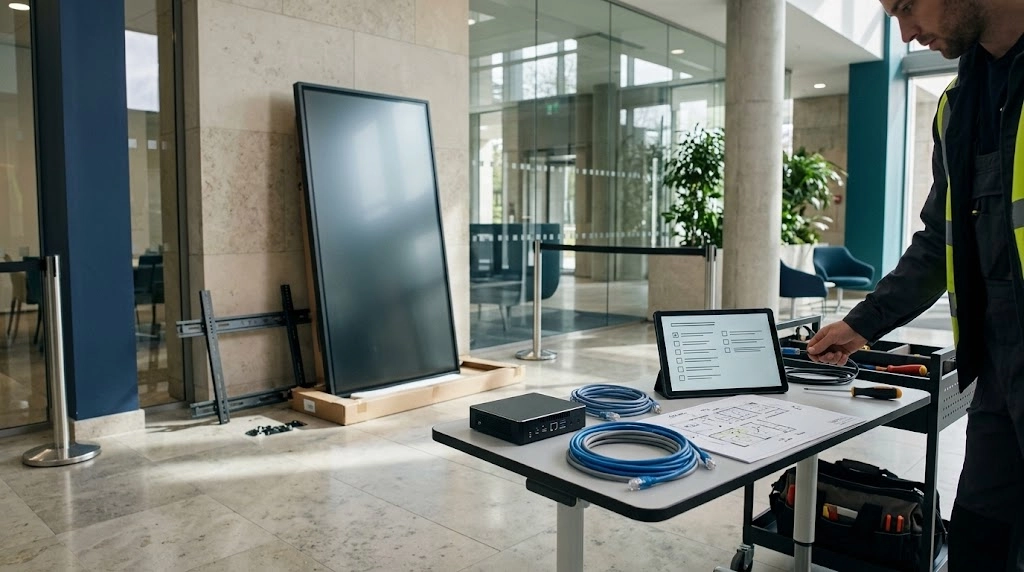
Digital Signage Installation Checklist: What to Prepare Before Setup
A digital signage installation checklist should confirm the screen’s purpose, viewing conditions, approved mounting location, power, connectivity, media player, content workflow and acceptance tests. It should also identify who supplies each component, who approves publishing and who supports the system after handover. Resolve these points before installation is scheduled.
A display can be securely installed and still disappoint if visitors cannot read the text, nobody owns the content or the player cannot reach its management platform. For offices, shops and shared buildings, preparation should connect the physical installation with everyday operation. Use this guide to brief suppliers, review responsibilities and agree what a completed installation must demonstrate.
What Should a Digital Signage Installation Checklist Cover?
Cover the complete system: display, mount, player, content software, power, network and operating responsibilities. Record the intended outcome and the evidence needed to accept each part of the installation.
Before ordering equipment, confirm:
- The message, audience and intended viewing location.
- The display’s operating conditions and supported orientation.
- The physical installation, cable routes and service access.
- The player, publishing method and connectivity dependencies.
- The content owner, approval process and account permissions.
- The tests, documentation and support included in the quotation.
The digital signage installation checklist should distinguish confirmed decisions from open questions. For example, a proposed wall position remains an assumption until the mounting and access requirements have been reviewed. Assign each unresolved item to a responsible person before it delays another part of the project.
How Do You Define the Screen’s Purpose and Audience?
Begin with one clear job for each screen. A directory helps visitors find a destination, a menu supports a purchase decision and an internal display communicates approved updates. Those tasks can require different layouts, update frequencies and viewing times.
Record who will view the screen, where they will stand and what they should understand or do next. Then prepare representative content before selecting the equipment.
- Audience: Visitors, customers, staff or residents.
- Task: Find a location, read a notice or review a short message.
- Content owner: The person responsible for accuracy and expiry dates.
- Viewing pattern: A quick glance, a queue or a longer visit.
Add these decisions to the digital signage installation checklist. For possible uses by property type, read Smartopia’s digital signage examples for businesses. Use those ideas to create a content brief rather than filling a screen with unrelated messages.
How Should You Check Viewing Distance, Lighting and Orientation?
Assess readability from the actual viewing position, using realistic content. Screen diagonal size alone does not establish whether a directory entry, price or notice will be legible.
AVIXA’s display image size guidance relates image size and viewing positions to the user’s task. Ask the designer to consider the information people must read, including the smallest important element.
- Check the expected viewing distance and approach angles.
- Review daylight, artificial lighting, reflections and glare.
- Confirm whether the content needs landscape or portrait orientation.
- Test a representative layout before approving the final design.
Include readability checks in the digital signage installation checklist, not just the display specification. W3C’s accessible design guidance offers useful principles for contrast and information clarity. It is web guidance, so applying those principles alone does not establish compliance for a particular physical signage installation.
What Must Be Confirmed for Mounting, Power and Ventilation?
Confirm the installation conditions for the selected display and mount. Review the supporting structure, equipment weight, fixing method, cable access and arrangements for maintenance or replacement. Identify work requiring appropriately qualified trades in the agreed scope.
- Mounting: Check compatibility, orientation and access to connections.
- Power: Confirm suitable supply locations and responsibility for new electrical work.
- Cooling: Follow the manufacturer’s ventilation and operating-condition requirements.
- Servicing: Allow access to the player, storage media and display controls.
Manufacturer requirements can differ between models. For example, Sharp/NEC’s M-series installation guide specifies orientation and ventilation conditions for particular displays. Those values should not be applied to unrelated equipment.
Use the digital signage installation checklist to record which manuals and drawings govern the proposed installation. Confirm the final position before cable routes, furniture or finished surfaces make changes difficult.
Which Network and Media Player Requirements Should You Confirm?
Choose the publishing method before planning connectivity. Signage may use a built-in player, an external player or another supported platform. The selected content, software and hardware must work together.
BrightSign’s setup guide illustrates several publishing arrangements, including cloud, local-network and standalone deployment. These are product examples, not evidence that every signage platform provides the same options.
| Content arrangement | Question to confirm |
|---|---|
| Locally stored media | How is content transferred, updated and recovered after a restart? |
| Cloud-managed content | Which network access is required for publishing, management and monitoring? |
| Live web pages or streams | What happens if the external source or connection becomes unavailable? |
Record the answers in the digital signage installation checklist. Include cabling, network permissions and responsibility for connectivity faults. Coordinate new links with network cabling installation in Toronto where needed.
Who Should Manage Content, Permissions and Publishing?
Assign content and account responsibilities before commissioning. The team that installs the system may differ from the team that approves messages or pays for ongoing software subscriptions.
Define who can create, approve, publish and remove content. BrightSign’s roles and permissions documentation demonstrates why permissions must be checked against the chosen platform’s actual capabilities and limitations.
- Identify the account owner and authorized administrators.
- Agree who approves public-facing material.
- Set owners and expiry dates for temporary notices.
- Document subscription renewal and user-removal responsibilities.
- Confirm the procedure for urgent corrections.
The digital signage installation checklist should include a publishing demonstration using the intended roles. Test that an ordinary content user can complete the required task without receiving unnecessary administrative access. If the platform cannot provide the required separation, resolve that limitation before handover.
What Should Be Tested Before Digital Signage Goes Live?
Test the actual content and workflow, not just whether the screen powers on. Define acceptance criteria in the proposal and record the result of each agreed check.
- Image: Verify orientation, scaling, readability and the intended input.
- Playback: Test approved media, schedules and transitions.
- Publishing: Confirm an authorized update reaches the correct screen.
- Permissions: Check the agreed user roles and restricted actions.
- Recovery: Verify the intended behaviour after a controlled restart.
- Connectivity: Test the agreed response to an unavailable network or content source.
BrightSign’s content-source guidance distinguishes locally available content from web or streaming content that depends on external connectivity. Confirm and test the selected system’s behaviour instead of assuming every screen will continue showing current information offline.
Use the digital signage installation checklist to record pass results, unresolved items and the person responsible for each follow-up action.
What Documentation and Training Should Handover Include?
Handover should allow the owner to operate the system and obtain support without reconstructing the installation from memory. Agree the documents and training sessions included before work starts.
- An equipment inventory with locations, identifiers and warranty details.
- The approved layout and relevant connection information.
- Account ownership, licence records and access-transfer arrangements.
- Instructions for publishing, scheduling and correcting content.
- Test records, outstanding items and agreed recovery procedures.
- Support contacts, coverage and escalation responsibilities.
Ask staff to complete a representative update during training. Record who handles a black screen, a failed publish, an expired subscription or a connectivity fault. Where device monitoring is included, clarify what it actually verifies.
Keep the completed digital signage installation checklist with the handover records. Future staff should be able to distinguish the accepted installation from later changes and find the person responsible for each part of the service.
How Do You Prepare a Digital Signage Installation Brief?
Use these four steps to assemble the information needed for an assessment. The brief supports design and quotation; it does not authorize physical installation.
- Describe the message and audience. List each screen’s purpose, intended viewers and representative content.
- Collect site information. Record proposed locations, viewing conditions, available plans and access constraints.
- Confirm technical dependencies. Identify existing displays, proposed players, power, network access and publishing requirements for review.
- Assign decisions and acceptance. Name the content approver, IT contact, property representative and person who will accept the completed work.
Attach the brief to the digital signage installation checklist and ask each supplier to identify assumptions, exclusions and missing information before finalizing the proposal.
Final Digital Signage Installation Checklist
Use this final review to identify open decisions. The responsible owner should confirm the evidence for each item rather than marking the project ready because equipment has arrived.
| Check | Evidence to confirm | Owner to assign |
|---|---|---|
| Purpose and content | Approved message, audience and representative layout. | Content approver. |
| Viewing conditions | Reviewed distance, angles, lighting and orientation. | Designer and property representative. |
| Mounting and access | Reviewed location, structure, mounting and service access. | Installer and relevant specialist. |
| Power and ventilation | Model-specific requirements and assigned installation work. | Installer and relevant trades. |
| Network and player | Supported publishing method and connectivity requirements. | IT contact and integrator. |
| Accounts and permissions | Named account owner and agreed publishing roles. | System administrator. |
| Acceptance testing | Agreed tests, expected results and follow-up process. | Client representative and integrator. |
| Handover and support | Documentation, training, coverage and contacts. | Property team and support provider. |
Digital Signage Installation Checklist FAQs
Can an existing TV be used for business digital signage?
Possibly. Check its operating hours, supported orientation, connection options, image settings and warranty conditions against the intended use. Confirm player and software compatibility before assuming an existing television is suitable.
Does digital signage require a permanent internet connection?
It depends on the publishing method and content. Some locally stored presentations can play without internet access, while live web content and remote updates may need connectivity. Test the intended outage behaviour on the selected platform.
What should be tested before a signage system goes live?
Test readability, content playback, schedules, publishing, permissions and recovery. Include the agreed response to an unavailable connection or content source. Record unresolved items and confirm who will correct them before acceptance.
Who should manage content after installation?
The owner should appoint a content lead and authorized publishers. Responsibilities should cover approval, updates, expiry dates and corrections. Administration, subscriptions and technical support may belong to different people and should be documented.
How much does digital signage installation cost?
Cost depends on display quantity, mounting, power, cabling, players, software, content work and testing. Compare itemized quotations and recurring charges. An equipment price alone does not describe the complete installed system.
Is a digital signage installation checklist enough to confirm readiness?
Only when its items are supported by the required reviews and decisions. A checklist organizes the work; site conditions, equipment requirements and any specialist installation responsibilities still need confirmation by the appropriate people.
Plan Your Digital Signage Installation with Smartopia
For a Toronto or GTA office, retail property or condo lobby, use the digital signage installation checklist to prepare your project brief. Smartopia’s digital signage installation services cover planning and coordination of compatible displays, players, content management and connectivity within an agreed scope.
Contact Smartopia to discuss your signage requirements. Share your property location, proposed screen locations, intended content and preferred installation window.
Sources and Further Reading
- AVIXA: Display Image Size for 2D Content.
- W3C WAI: Designing for Web Accessibility — general design principles, not a physical-signage compliance assessment.
- Sharp/NEC: M751, M861 and M981 Installation Guide — requirements for those specific models.
- BrightSign: Quickstart Guide.
- BrightSign: System Roles and Permissions.
- BrightSign: Content Source Considerations.

Comments are closed